Some parts of the product aren't glowing
Attention, be sure to check that you are using the correct batteries and they are fully charged!
To accurately fix the problem, we recommend replacing two LEDs. The one that glows last, and the one that does not glow!
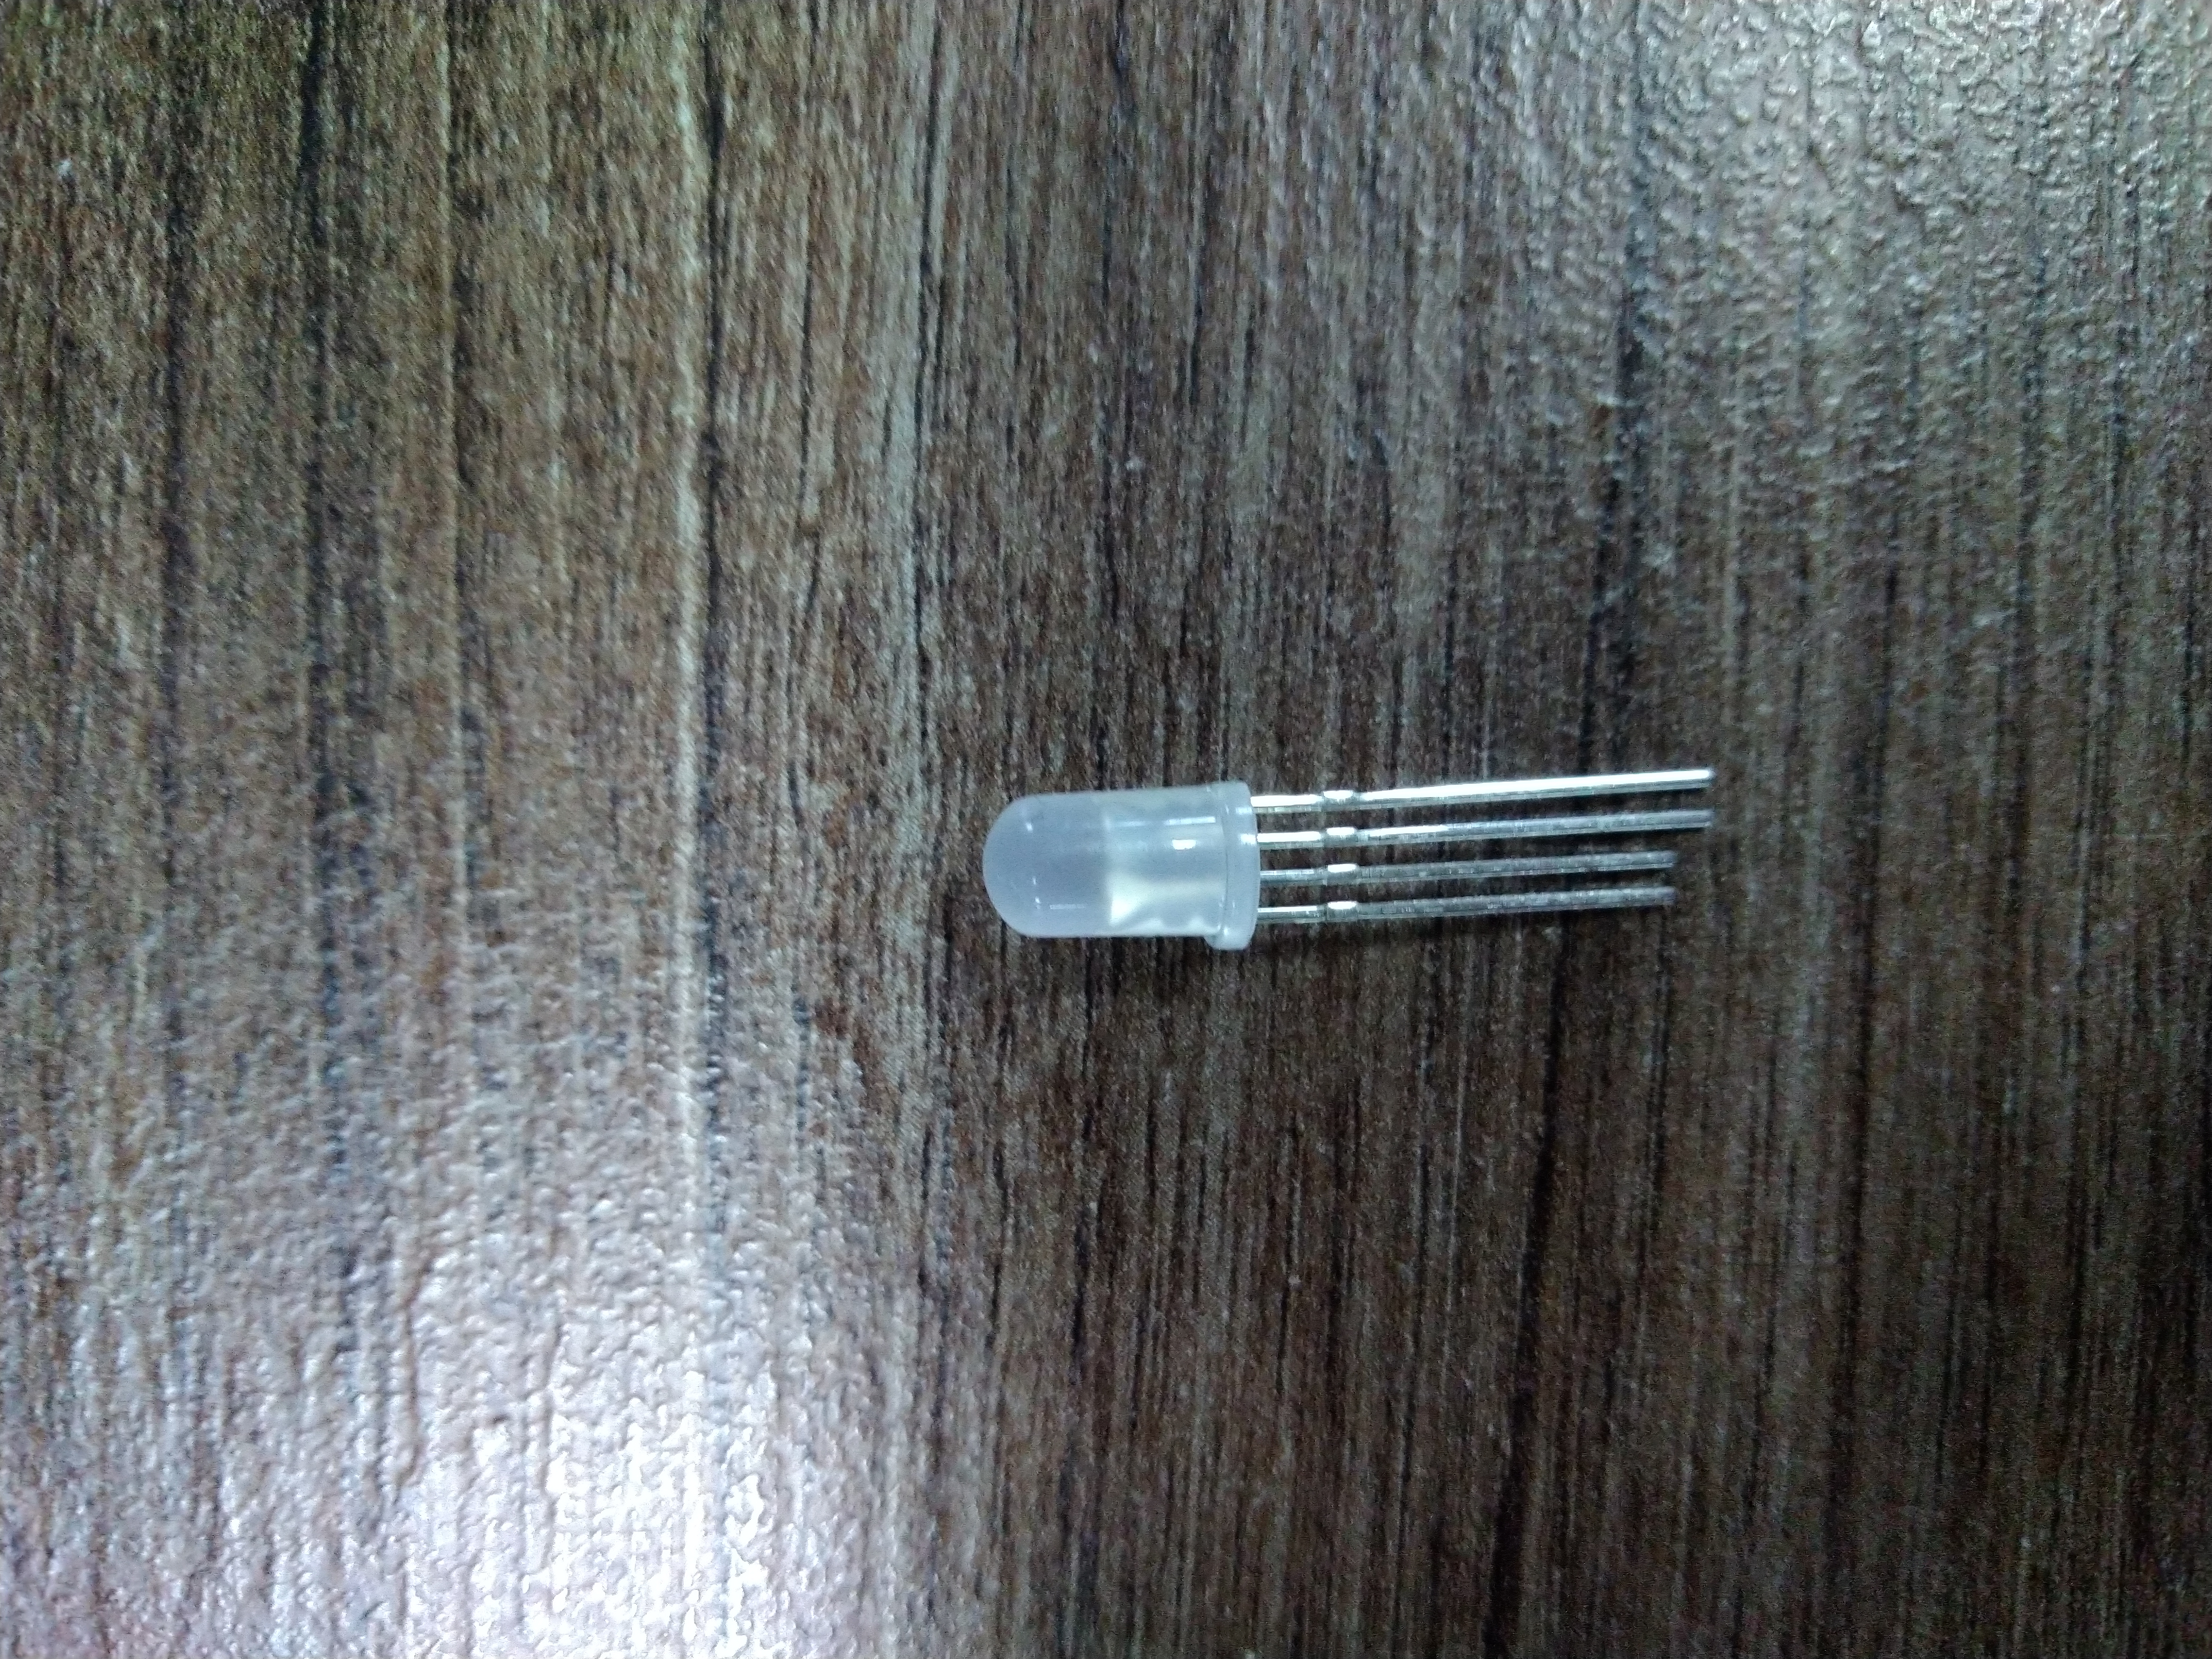
Pay attention to the dot on the LED, it points at the negative wire. Below you will see the polarity of each wire: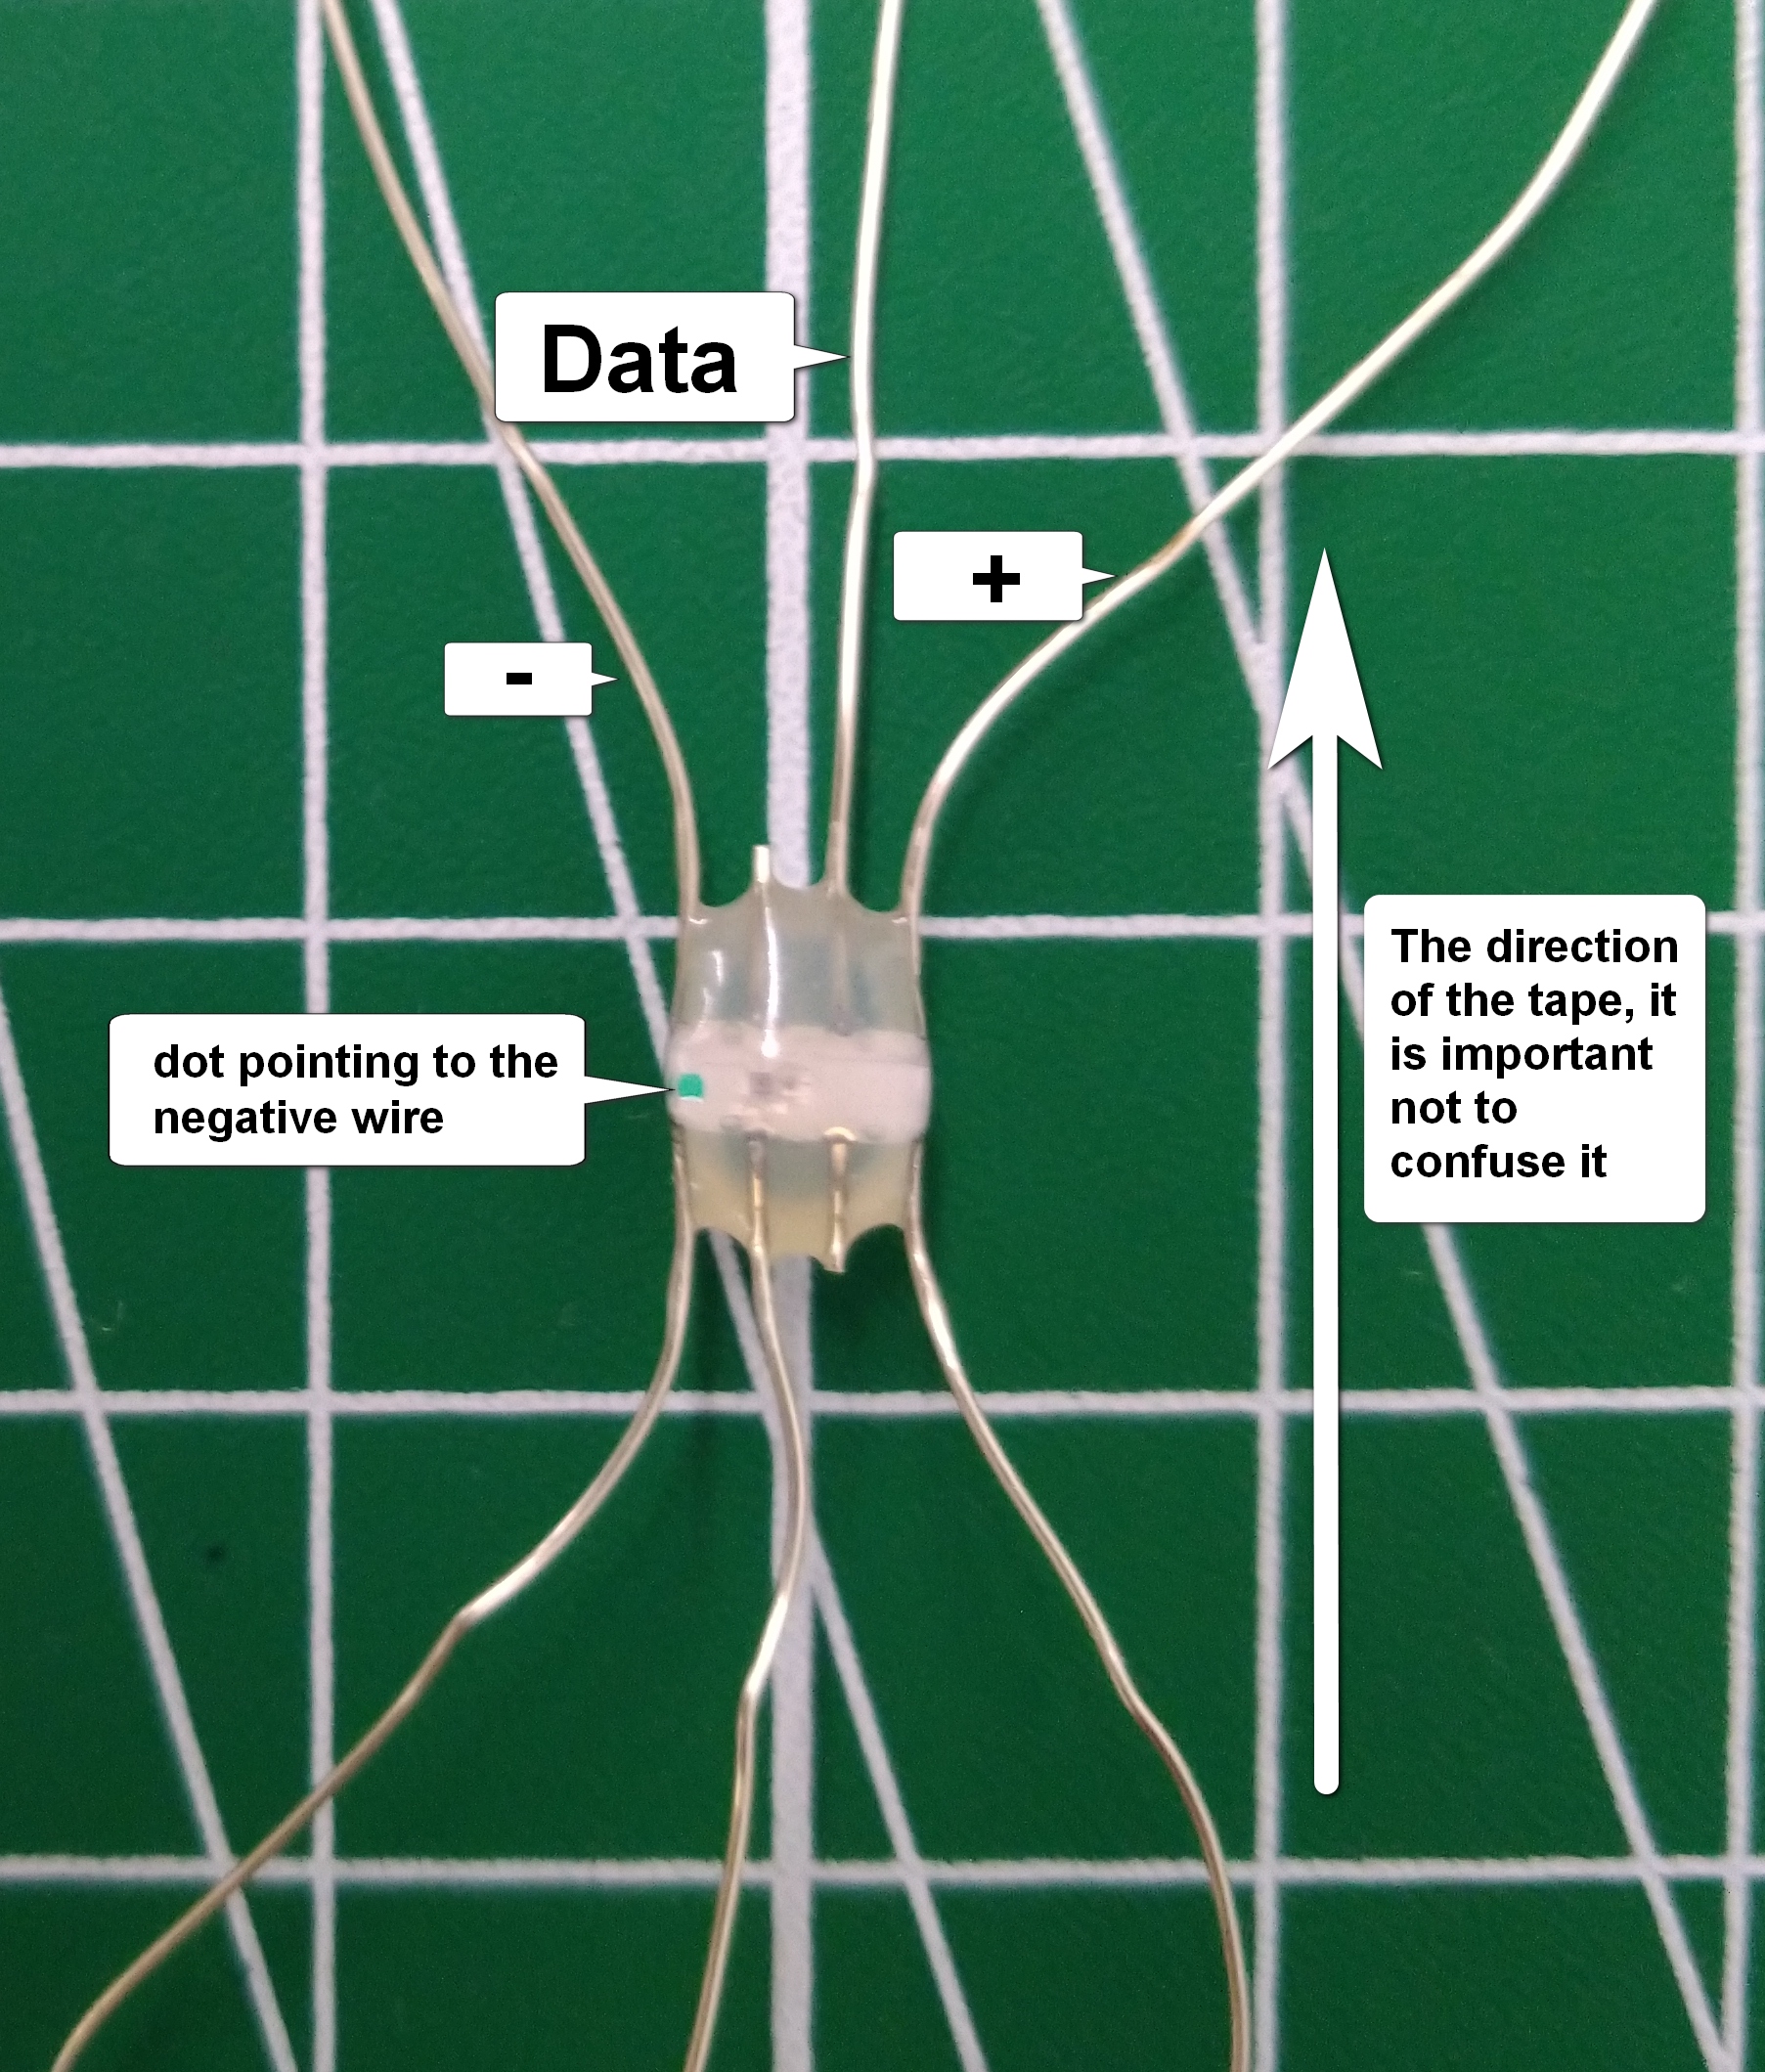
You can find out which batteries are suitable for our devices and how to charge them with the Imax B6 charger using the links below:
What batteries are needed?
How to charge 18650 type batteries with Imax B6 charger or similar?
What batteries are needed?
How to charge 18650 type batteries with Imax B6 charger or similar?
If you are sure you are using the correct batteries and they are fully charged, the effect is reproduced normally (without jerks and freezes), and part of the product does not glow, which means that the diode has burned out or the wire has come off (break in the soldering) as a result of mechanical damage. But don't worry, it's easy to fix!
Below you will see how to fix the problem on different products with different types of diodes.
Solution: re-soldering of the connection or replacing the LEDs.
Don't worry, along with your order you will receive a repair kit, which contains everything you need for repair
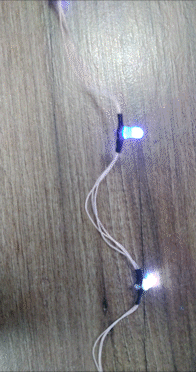
Products with separately located diodes connected by flexible wires (products for belly dancing, Peacock Tails, ballet tutus, angel wings, etc.):
 In the video, you can see the diode replacement process.
To accurately fix the problem, we recommend replacing two LEDs. The one that glows last, and the one that does not glow!
Pay attention to the dot on the LED, it points at the negative wire. Below you will see the polarity of each wire:
Also, do not forget to remove the varnish well from the LED wires before twisting, and if you have a soldering iron, it is better to solder the connection.
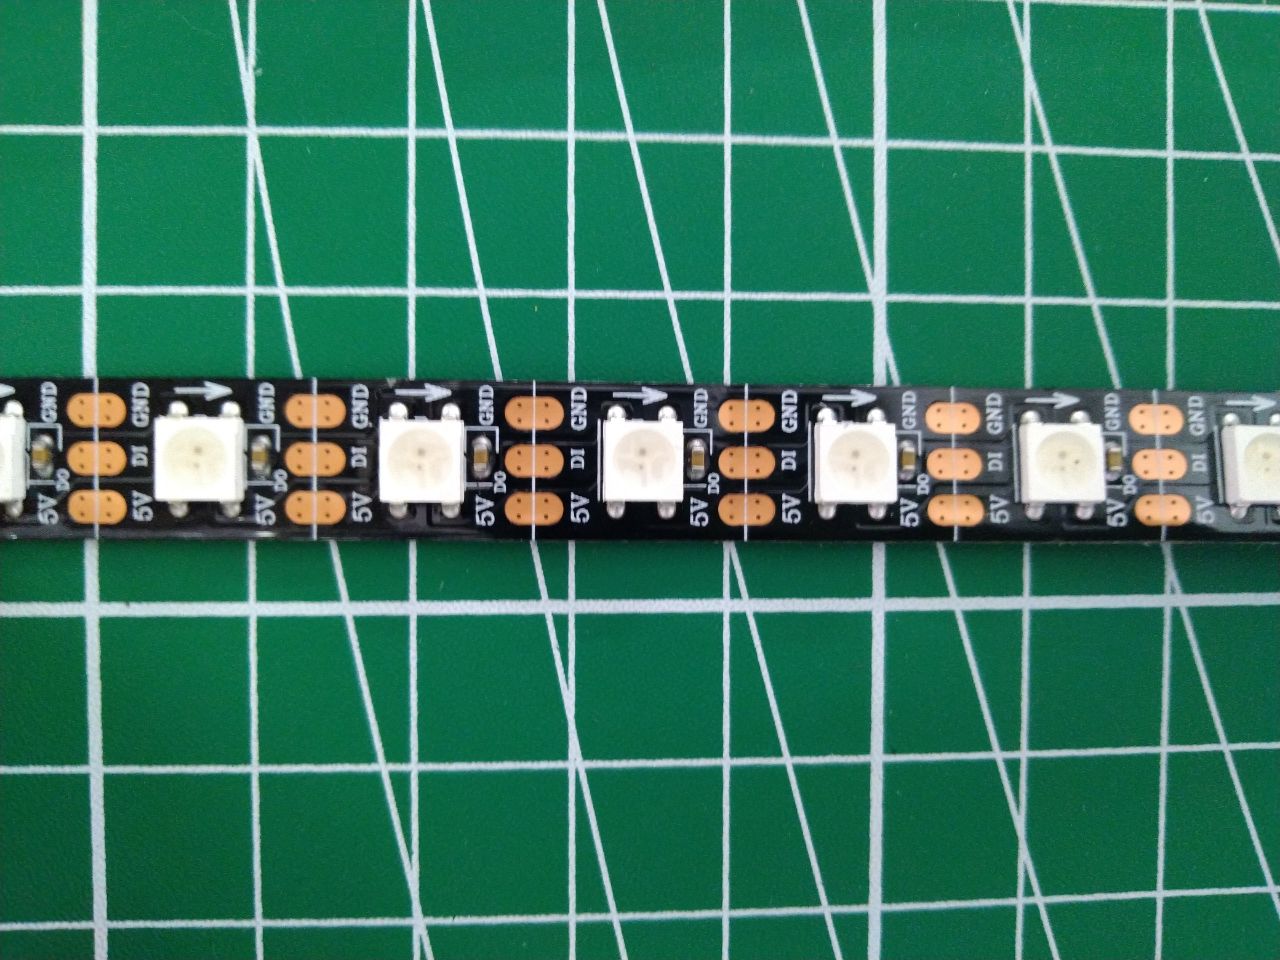
Products made using a factory-produced LED strip (Distance between diodes can be different):
In the video you can see the diode replacement process
To accurately fix the problem, we recommend replacing two LEDs. The one that glows last, and the one that does not glow!
Pay attention to the arrow on the LED strip, it indicates the direction of the strip. Below you will see the polarity of the strip:
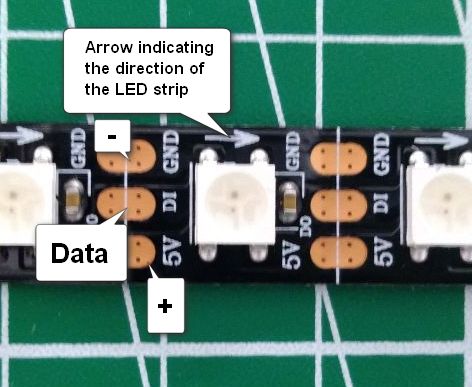 Contacts are also signed on the strip itself. You need to solder it according to the contacts.
Products made using single diodes interconnected by wires (LED jackets):
Products are made from such LEDs:
These diodes are interconnected in a strip:
In case of problems with this type of diode, you need to replace one strip with a damaged wire or diode:

To replace the strip, you need to remove the diodes from the eyelets, remove the heat shrink and remove the tape. Put the heat shrink on the new LED strip, glue the LEDs back with superglue, and insulate the connections with heat shrink.
To replace the strip, you need to remove the diodes from the eyelets, remove the heat shrink and remove the tape. Put the heat shrink on the new LED strip, glue the LEDs back with superglue, and insulate the connections with heat shrink.
In the video you see the replacement of the LED strip on the jacket:

Products with a new type of flexible LED strip:

The video shows two ways to replace the LED:
1). With the help of twisting, this is an emergency method that involves repairing when you do not have a soldering iron nearby.
You need to place the LED strip in front of you, droplet up, and do the following steps step by step:
- Cut the LED strip (this can be done with wire cutters, knife or scissors).
- Separate the wires of the LED strip.
- Strip the insulation from the wires (using wire cutters, a knife or scissors. Our specialist in the video does this with his hands)
- Put heat shrink on the wires.
- Connect the wires together by twisting them (In the picture below, you will see the location of the polarity of the wires).
- Put heat shrink on the twist.
- Check the operation of the tape, if it does not glow, then double-check the correct twisting of the wires
- Heat the heat shrink (in the video we use a professional hair dryer, but you can use a lighter)
LED wiring diagram:
2). Using soldering - All steps of this method are similar, only instead of twisting, you need to tin the wires and solder them with a soldering iron.
Hot melt adhesive can be used for additional sealing in both methods!
To accurately fix the problem, we recommend replacing two LEDs. The one that glows last, and the one that does not glow!
Related Articles
How to assemble Smart LED Rainbow Screen Mask
This manual will tell you how to assemble and work with Smart LED Rainbow Screen Mask To work with the Ballet tutu, you need to purchase 18650 batteries Flat-top batteries are recommended, but not required. Make sure the battery is 65 mm long, some ...Programming Custom LED Effects with Madrix: A User-Friendly Guide
Before You Begin Welcome to the exciting world of LED effect customization! This comprehensive guide is designed to walk you through every step of the process, ensuring that even if you’re new to computers, you’ll be able to follow along and ...How to assemble Smart LED Bellydance Rainbow wings – 500 LEDs by ETERESHOP B05
This manual will tell you how to assemble and work with Smart LED Bellydance Rainbow wings – 500 LEDs by ETERESHOP B05 To work with the wings, you need to purchase 18650 batteries Flat-top batteries are recommended, but not required. Make sure the ...Caring for Your LED Costumes and Props
Your LED costumes and props are a unique and eye-catching addition to any performance or event. To ensure that they last for many years to come, it is important to handle them with care. Here are some tips for keeping your LED costumes and props in ...LED Effects Programming using ETERESHOP Screen Grabber
For those of you who bought our LED pixel products and don’t have much time for creation of your own effects, ETEREshop team released a specialized software to grab effects you like from any source. Grabbed image can be uploaded straight to the SD ...