LED Effects Programming using ETERESHOP Screen Grabber
For those of you who bought our LED pixel products and don’t have much time for creation of your own effects, ETEREshop team released a specialized software to grab effects you like from any source. Grabbed image can be uploaded straight to the SD card or controller to be shown on programmable costumes. As simple as that:
- Step 1 – Installation
- Step 2 – Check compatibility options
- Step 3 – Run the recorder and grab an effect
- Step 4 – Recorder settings
- Step 5 – Upload an effect and show it on a costume
This option will work for our LED party jackets and vests, dance video screen costumes and pixel masks.
 NOTE! Turn off all useless programs before recording as the program performance depends on computer processor. It’s also not recommended to record in full screen size. Smaller window for recording will have better performance.
Step 1 – Installation
Links to download:
- Jinx! - a free program that might help you with some complex effects that require a scrolling text or a moving logo
for Windows:
The first step is to install (or update) .Net Framework software framework. Minimum version required is 4.5.2 and setup your OS settings. .Net Framework installer is added to the recorder installer so it’s a must.
NOTE! Make sure that your antivirus doesn’t block it and add it to the whitelist if necessary.Now you need to install the program using the .exe file out team has sent to you.
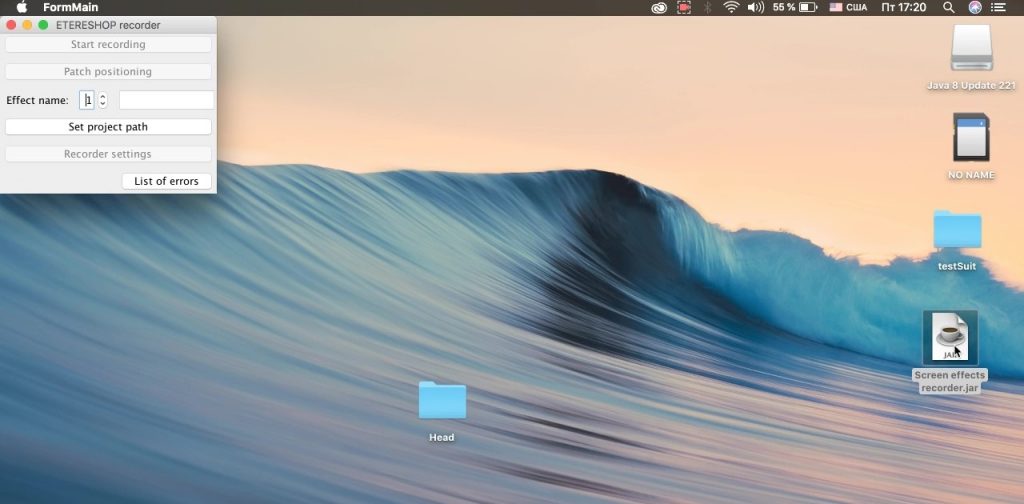
for Mac OS:
To run the progtram on Mac OS you need to install (or update to the latest version) Java and set up your OS settings.

Once Java has been installed or updated, you can run the recorder. To do that open .jar file with the screen recorder.
If you have problems with installation this article will help you: https://java.com/en/download/help/mac_install.xml
 NOTE! Also before recording starts on Mac OS you may see a request for permission from the program. It’s normal because Mac
blocks any programs to control the system by default.
If recorder will show a message about mouse hook fail and you’ll see an option to open system preferences panel, open it and set checkbox for Jar launcher (click the ‘lock’ at bottom left corner of the screen to enable settings change).
Step 2 – Check compatibility options
Once have installed the program, check a couple of options to make sure that it will work correctly. To do that right click on the program file to open settings and then:
- For Windows 7: Go to the ‘Compatibility’ tab and check ‘Disable display scaling on high DPI settings’. Press OK.
- For Windows 8 and 8.1: Go to the ‘Compatibility’ tab and check ‘Disable display scaling on high DPI settings’. Press OK.
- For Windows 10: Go to the ‘Compatibility’ tab and press ‘Change settings for all users’ button. Press ‘Change high DPI settings’ button in a new window that will appear. And at the last appeared window check ‘Override high DPI scaling behavior’. Set ‘Scaling performed by’ to ‘Application’. Press ‘OK’ for each window.
NOTE! Recorder won’t work correctly without these settings.Step 3 – Run the recorder and grab an effect
Check the quick start to see how the program will work. To do it you’ll need a project folder (you must have received it from us together with a costume).
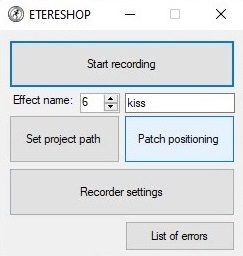
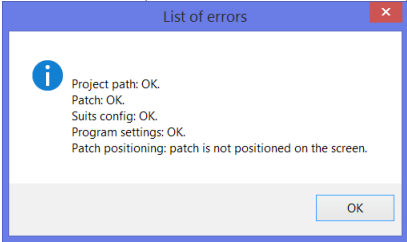
Set the project path by clicking on a button with the same name and choose the project folder on your computer. Check the ‘List of errors’. The data must look like that:
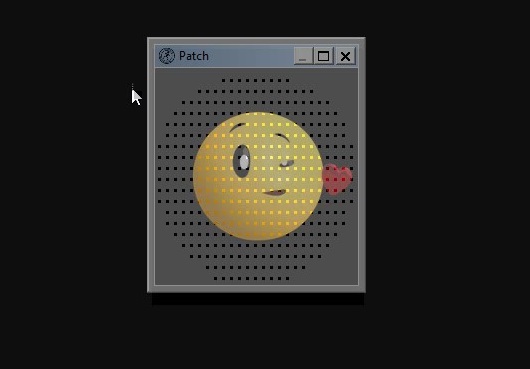
Press ‘Patch positioning’ button, set patch position by dragging the window and choose the size of an area you want to record effects from.
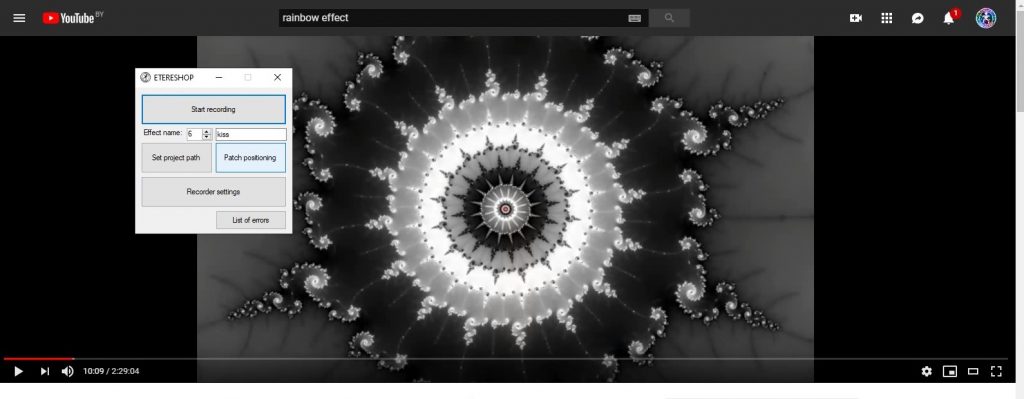
Patch window is transparent and you can see through it. Close patch window by pressing close button. Program will save the effect to the corresponding folder.
 NOTE! You can’t change patch position or size when effect recording has started.
Now ‘Start recording’ button must be active. Press ‘Start’ and you will see patch window with recording info string at the top. You can stop recording by pressing standard close window button.

NOTE! The cursor moving in a selected area won’t be recorded as a future effect. Make sure that no other windows will open during the recording process
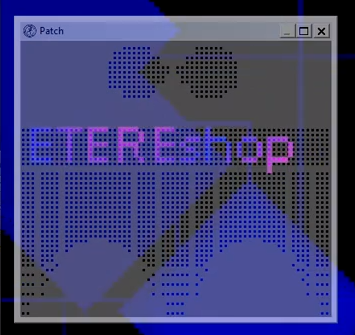
NOTE! For an example above (Smart LED dress ‘Eva’) we wanted to demonstrate text on a belt. We’ve used Jinx! program but you can also use Madrix software for the same purpose.
Step 4 – Recorder settings
Use the ‘Recorder settings’ button to change settings if necessary.
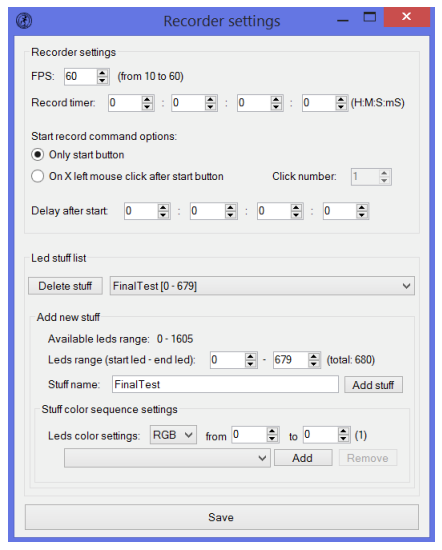
Recorder settings options.
– FPS – the number of frames per second while recording an effect.
(It is usually set to the maximum value – 60, but in rare situations it must be decreased).
-Record timer – for how long the record should continue.
Start record command options.
Settings to choose conditions for the start of recording: how many mouse clicks and which button exactly should you click to start. If you left ‘0’ value you’ll need to stop recording manually.
You can also set delayed start of recording after pressing ‘Start recording’ button’. Just set timer to ‘0’ if you don’t need this option.
Step 5 – Upload an effect and show it on a costume
Effects will be saved to the project folder (see project folder → Effects folder → folder with the stuff name).
Copy it to the SD card of our led controller and marvel the job well done!
Related Articles
How to assemble Smart LED Rainbow Screen Mask
This manual will tell you how to assemble and work with Smart LED Rainbow Screen Mask To work with the Ballet tutu, you need to purchase 18650 batteries Flat-top batteries are recommended, but not required. Make sure the battery is 65 mm long, some ...Programming Custom LED Effects with Madrix: A User-Friendly Guide
Before You Begin Welcome to the exciting world of LED effect customization! This comprehensive guide is designed to walk you through every step of the process, ensuring that even if you’re new to computers, you’ll be able to follow along and ...How to assemble Smart LED Bellydance Rainbow wings – 500 LEDs by ETERESHOP B05
This manual will tell you how to assemble and work with Smart LED Bellydance Rainbow wings – 500 LEDs by ETERESHOP B05 To work with the wings, you need to purchase 18650 batteries Flat-top batteries are recommended, but not required. Make sure the ...How to assemble Smart Pixel Fairy Cosplay Angel Wings with 200 LEDs by ETERESHOP O11
This manual will tell you how to assemble and work with Smart Pixel Fairy Cosplay Angel Wings with 200 LEDs by ETERESHOP O11 To work with the wings, you need to purchase 18650 batteries Flat-top batteries are recommended, but not required. Make sure ...Some parts of the product aren't glowing
Attention, be sure to check that you are using the correct batteries and they are fully charged! You can find out which batteries are suitable for our devices and how to charge them with the Imax B6 charger using the links below: What batteries are ...